

Are you looking to bring a touch of beauty and creativity into your life, or even expand your current product line? When it comes to crafting something truly unique that will light up any room, nothing quite compares to making your own pillar candles. Because they are both highly practical and deeply decorative, pillar candles are an exceptional addition to any home fragrance brand.
Crafting a freestanding pillar candle is an incredibly enjoyable, therapeutic activity. It allows you to work creatively with your hands while unlocking the power of aromatherapy. Whether you are pursuing this as a relaxing weekend hobby, prepping for a local craft fair, or expanding your e-commerce business, pouring your own custom molds is immensely rewarding. Let’s get started!
Materials & Tools You’ll Need:
-
Golden Brands 494 Pillar Wax: 2.2 lbs of dedicated pillar wax.
-
Fragrance Oil: 3.5 oz of premium, candle-safe scent oil.
-
Wedo ECO Raw Wick: Spooled wick sized specifically for the diameter of your mold.
-
Large Candle Mold: High-quality silicone pillar mold.
-
Candle Dye (Optional): Concentrated liquid dyes or dye blocks.
-
Wick Bar: A standard wick bar to keep the wick taut.
-
Additional Equipment: A digital scale, a reliable thermometer, a heat-resistant pouring pitcher, a stirrer, and a double boiler setup or wax melter.
-
Stabilizing Tool: A pouring jug, box, or heavy bowl to hold your mold perfectly upright during the pour.
Step-by-Step Instructions
1. Prep Your Workspace and Measure
Before you begin, set up a clean, flat workspace. Cover your surface with parchment paper or silicone mats to catch any accidental drips, as dealing with molten wax can get sticky! Ensure your candle molds are completely clean and dry.
Using your digital scale, weigh out your wax chips. For a large statement pillar candle, this recipe uses 2.2 pounds of specialized pillar wax.
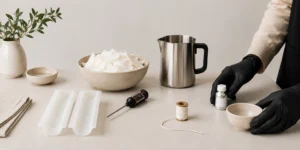
???? Smart Spacing Tip: If you aren’t sure how much wax your custom mold holds, simply fill it to the top with water and pour it into a measuring cup to find the volume in fluid ounces.Take 20% off find the exact weight of dry wax chips you need to melt.
2. Melt the Wax
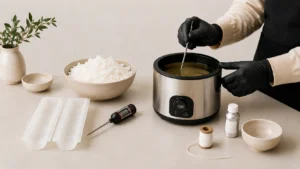
Add your measured wax into your melting pot or a pouring pitcher placed inside a water-filled saucepan (a double boiler setup). Heat the wax gently over medium-low heat to 158°F, stirring slowly. Do not allow your wax to exceed 176°F. It typically takes about 10 to 15 minutes to melt completely.
3. Wick and Seal the Mold
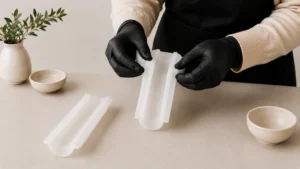
While the wax melts, prepare your mold. If you are using a two-part or split mold, firmly secure the halves together, ensuring all seams are pressed tightly shut. Thread your wick through the small hole or notch at the bottom of the mold, leaving a little bit of excess wick on the outside.
Seal the bottom hole tightly using mold sealer putty or heavy tape to prevent any hot wax from leaking out. Pull the wick firmly through the center top of the mold so it is perfectly taut, thread it through your wick centering tool, and clamp it in place with a binder clip. To prevent any accidental tips, place your mold inside a heavy pitcher or box to stabilize it.
4. Add Fragrance and Color
Carefully remove your melted wax from the heat source. Allow the wax to cool down slightly to 149°F, then slowly pour in your fragrance oil and stir continuously for two full minutes. We recommend a 10% fragrance load for a powerful scent throw. If you are adding candle dye, incorporate it at this stage as well, stirring gently until the color is completely dissolved and evenly dispersed.

Pro-Tip: Adding your fragrance oil while the wax is too hot will cause the scent to flash off and evaporate, drastically reducing the scent throw of your finished pillar.
5. The Pour
Check your temperature one last time. When the wax reaches 140°F, slowly and smoothly pour the liquid into your stabilized mold. Leave about 1/2 inch of space at the very top. Pouring slowly is crucial because it prevents unwanted air bubbles from getting trapped along the edges of your design. Set aside any leftover wax in your pitcher, you will need it for the cooling process. Let your candle set overnight.

6. Fix Sinkholes and Demold
Because pillar waxes naturally contract and shrink as they cool, a sinkhole will inevitably form around the wick in the center. Don’t worry—this is an expected part of the craft! You can easily fix this using two methods:
-
The Heat Gun Method: Gently run a heat gun over the top layer of the candle. The surface will melt slightly, self-leveling into a flawlessly smooth base.
-
The Top-Up Method: Reheat your leftover wax back to 149°F and carefully pour a thin layer over the sinkholes to fill the gaps completely.
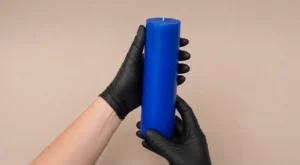
Once the candle has completely cooled and set, remove the wick centering tool and the putty from the bottom. Gently pull or slide your pillar candle out of its mold. Trim the top wick down to 1/4 inch and cut the bottom wick completely flush with the wax so the candle sits perfectly flat. If your business uses safety warning labels, apply them to the flat bottom of the candle now.
FAQ
What is the difference between a pillar candle and a container candle?
Pillar candles and container candles require entirely different wax formulations and techniques. Pillar candles are freestanding wax structures meant to sit directly on a heat-safe plate, tray, or holder. Because they must hold their own shape without a jar, they require a much harder, more durable wax blend. Container candles, on the other hand, are poured directly into glass or metal jars and use a much softer wax designed to adhere perfectly to the walls of the vessel.
What wax is best for making pillar candles?
Because a pillar candle needs to be rigid and cleanly release from a mold, you must use a dedicated pillar or tart wax blend:
-
Paraffin Pillar Blend: The classic choice for crisp details, brilliant colors, and a strong, immediate scent throw. It releases effortlessly from rigid molds.
-
Soy Pillar Blend: A natural, biodegradable option formulated specifically for structural stability. It holds scents beautifully and satisfies eco-conscious customers.
-
ParaSoy Blend: The best of both worlds. It combines the clean look and eco-appeal of soy with the vibrant color depth and high scent throw of paraffin.
-
Coconut-Rapeseed Melt Wax: A premium, plant-based, soy-free alternative that handles repeated heating cycles beautifully and offers an incredibly clean burn.
How can I make sure my pillar candles release easily from the mold?
The secret to an easy release is using the correct wax and temperature control. Pillar waxes are specifically designed to shrink slightly as they cool, which naturally pulls the candle away from the mold walls. If your candle feels stuck, pop the mold into the refrigerator for 10 to 15 minutes. The cold temperature will cause the wax to contract just a bit more, allowing it to slide right out. Never use brute force, as this can crack your design.

